DIY Dynamic Weaving 🧶

Sneak Peak into Minni Dynamic Designers!
Minni Summer Program is in full swing and if you’re interested in knowing the kinds of
projects your little artist(s) get up to then you’re in luck! This month we’re showing a DIY directly from Minni’s Dynamic Designers program to give you a sneak peak.
Minni Summer Program offers dynamic and educational art content all week long to keep your little one(s) engaged and entertained throughout the summer. Each week we offer a different theme to keep it fresh and captivating for students. Outdoor art making is encouraged when the weather cooperates and you can often find us making field trips to local art galleries and businesses for educational purposes.
Learn more about Minni’s Summer Program here, and we hope you enjoy your weaving!
Check out the full instructions and material list below to get started!
Materials:
Recycled artworks you’re okay with cutting up
9x12” felt or card stock
Scissors
Rulers
Pencils
Glue sticks
Yarn or ribbon pieces
12” wood dowel
Hot glue (for grown-ups)
Hole punch
Optional: markers, crayons, dot or shape stickers, and washi tape
Let’s get started!

Steps
1. Begin by using a ruler to draw straight lines on the back of some of your decorated papers, about 0.5–1 inch apart.
2. Next, carefully cut along these lines to create paper strips.
3. Next, make your loom by drawing lines on your card stock paper or felt about one inch apart. However, make sure to leave about 1 inch of boarder on all sides.


4. Cut along your lines to create your loom.
5. Follow the basic pattern of weaving: over, under, over, under, over, under as you practice weaving a paper strip through your loom.
6. For the next strip, start by going under, then over.
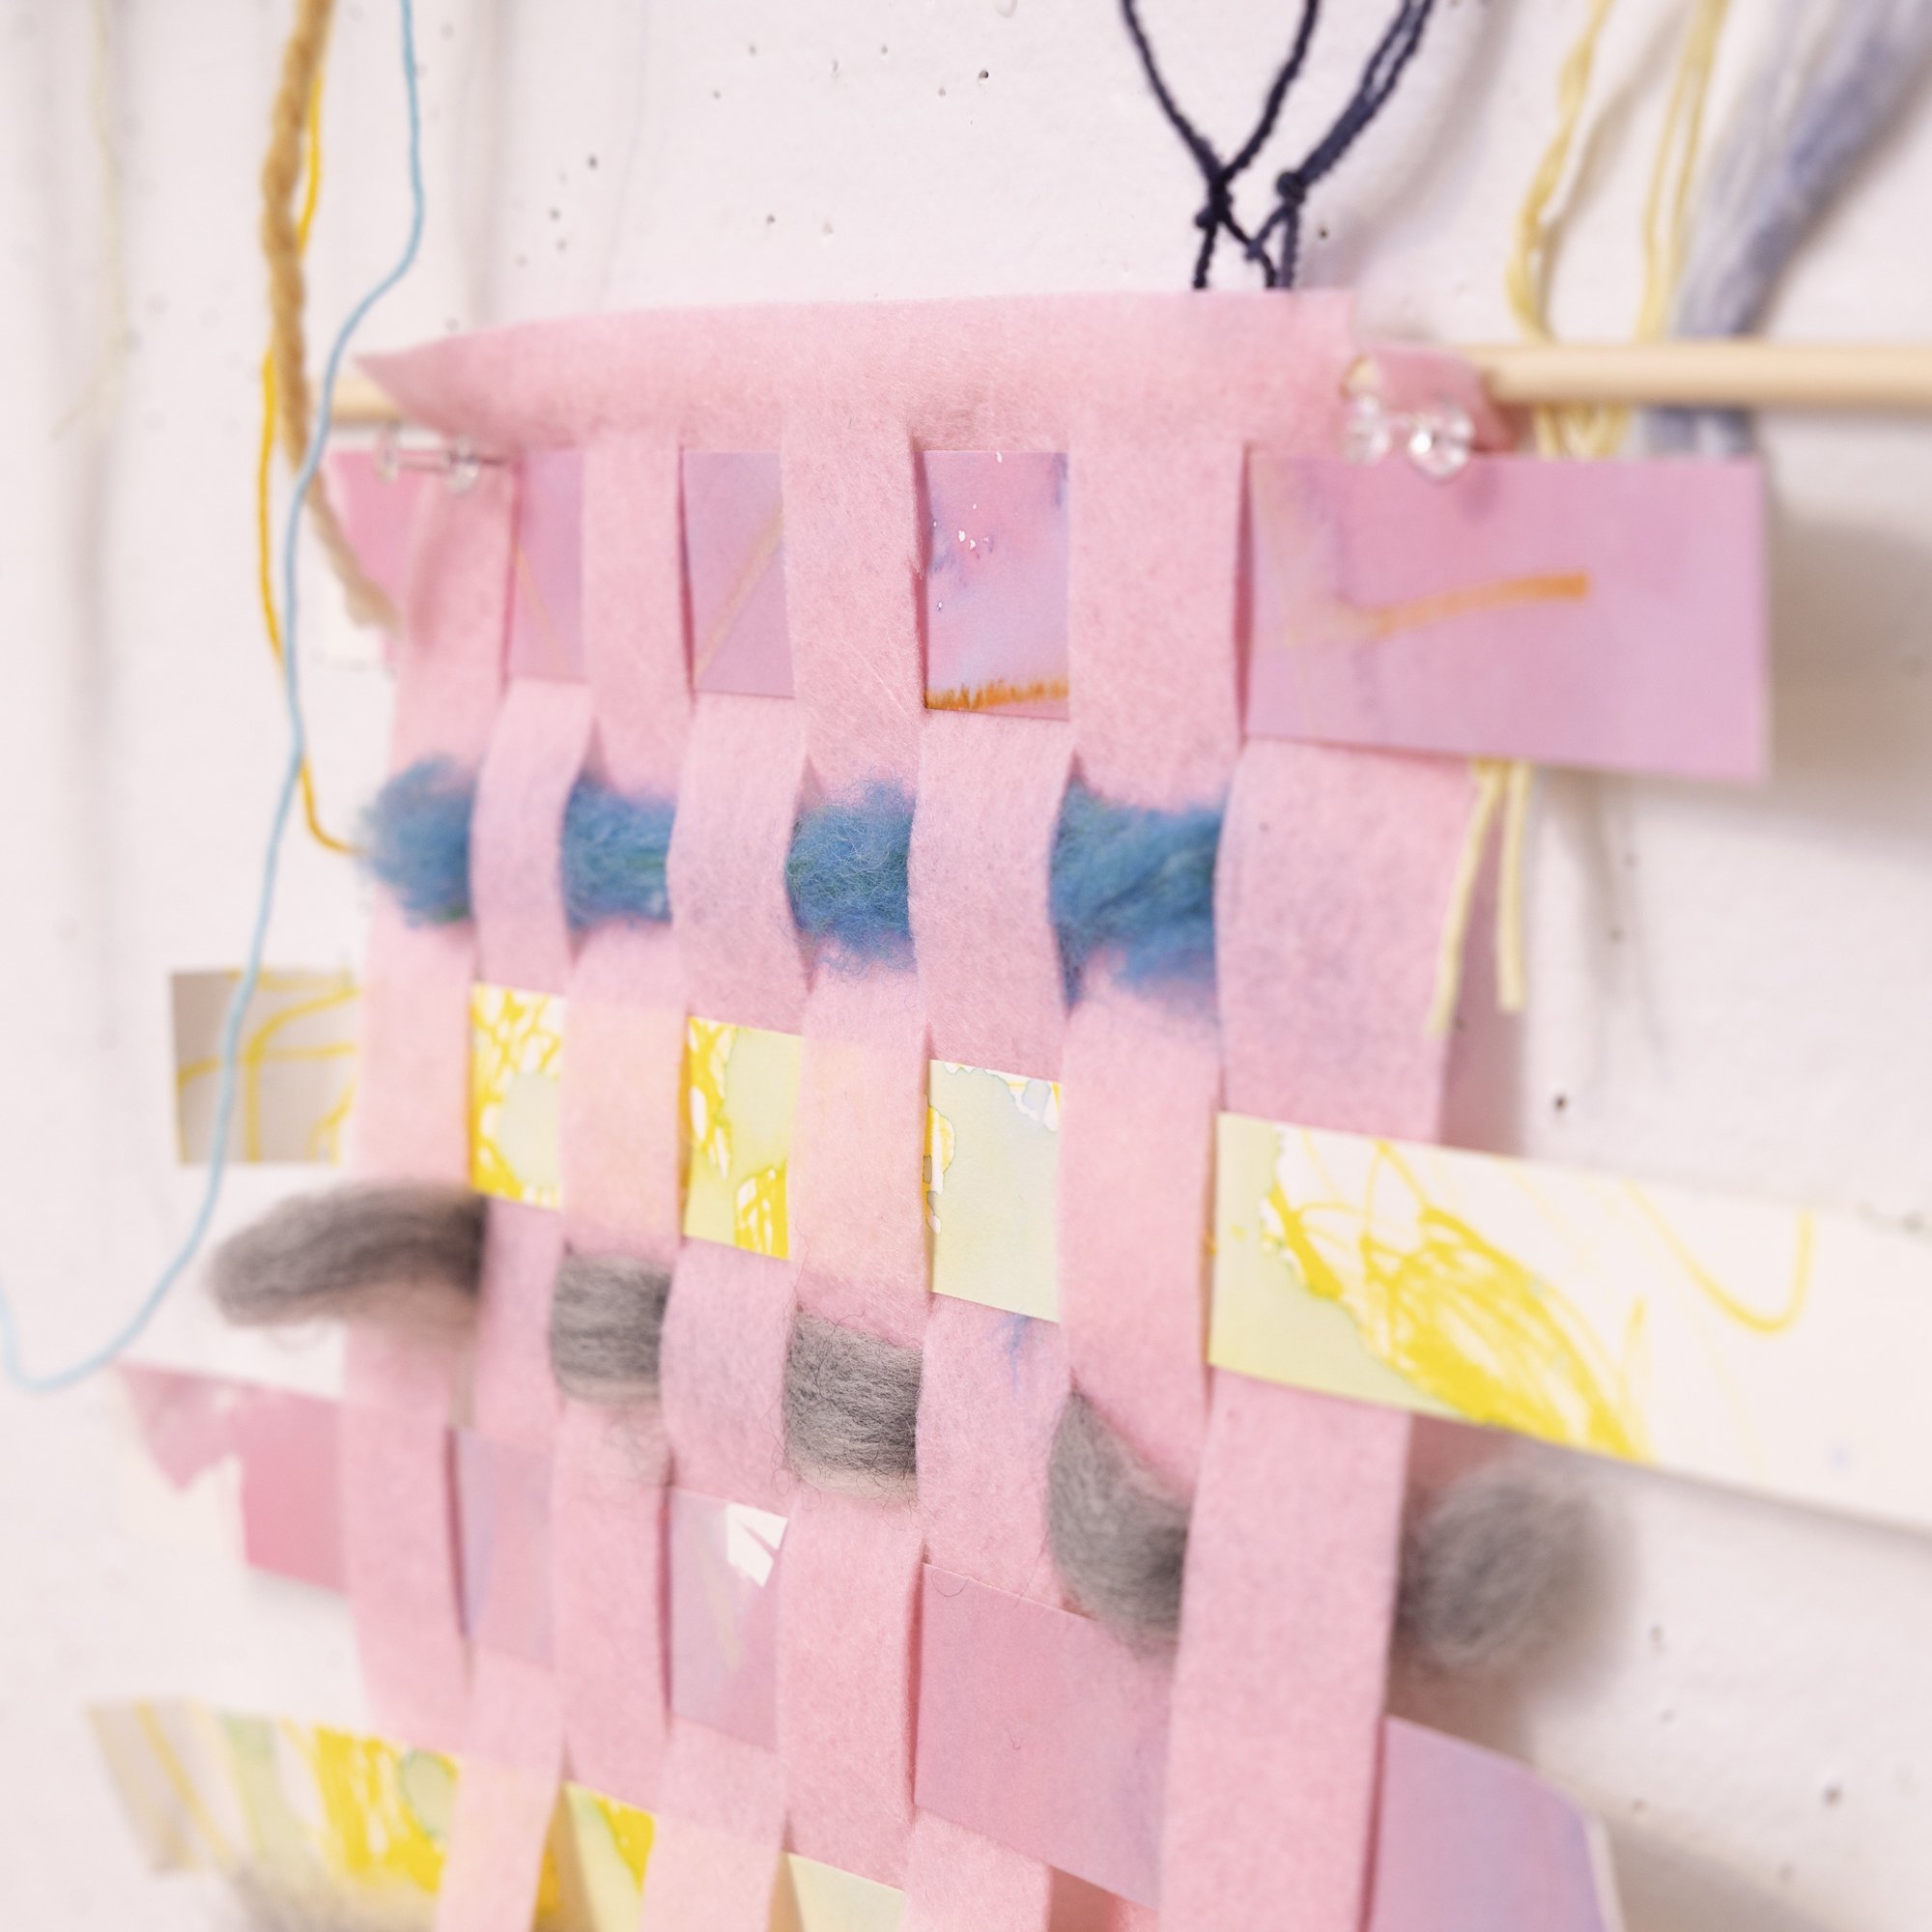
7. When you have filled your loom with paper strips, use a glue stick or tape to secure the ends on the back before trimming excess.
8. If you would like, you can add an additional layer of detail to your weaving using dot or shape stickers, markers, crayons, and washi tape.
9. In order to hang your weaving, get help from a grown-up to hot glue a dowel to the top of your loom, then tie a piece of yarn or ribbon to the dowel so you can hang it.
10. You can also hole punch the bottom of your loom and add yarn tassels to the bottom!

