DIY Woven Flowers

Paper Flower Weavings
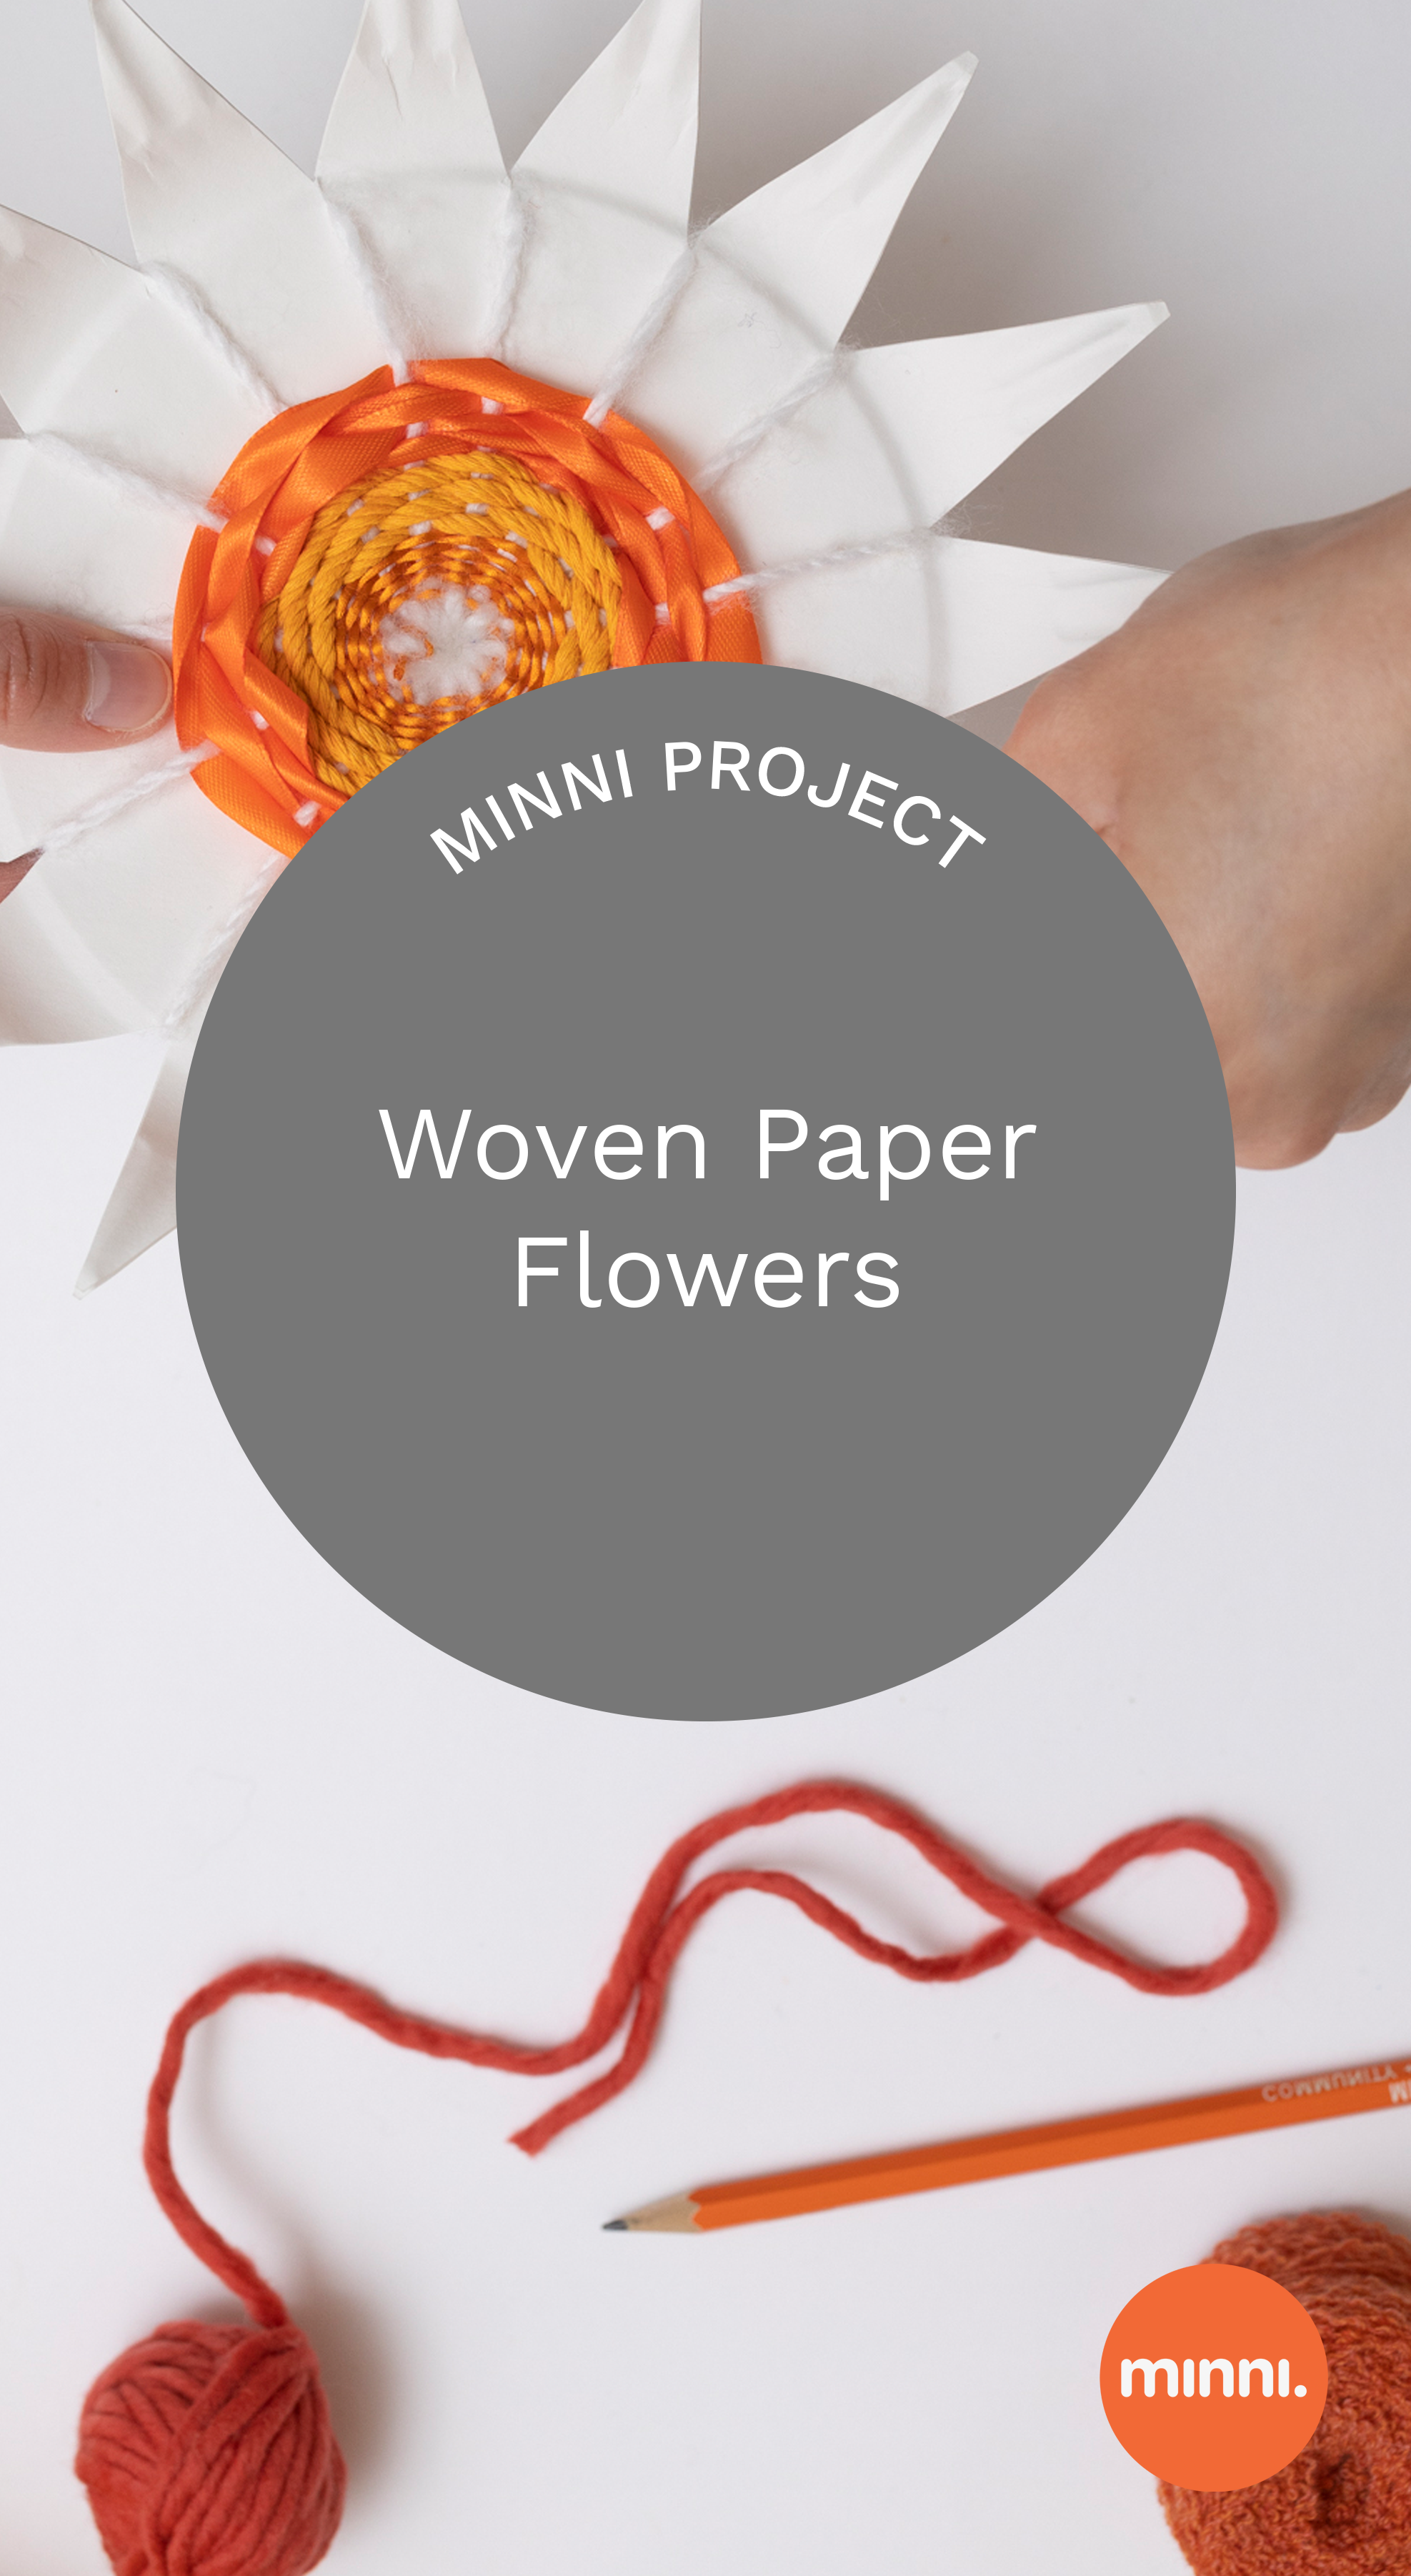
Use circle weaving to transform a paper plate into a colorful + textural flower! This project is best for ages 6+.
Materials
Paper plate, any size
Pencil
Scissors
Assorted yarn and ribbon
Plastic needle, masking tape, or liquid glue (optional)
Steps for Paper Flower Weavings
1. Use a pencil to mark lines around the paper plate. You can choose any number over 5, but this project works best with an odd number. Use the scissors to cut slits about 1-2” long where you made your marks.

2. The space between the cuts will become flower petals! Use scissors to cut and shape each petal, pointy or curved.

3. Use a pencil to carefully poke a hole in the center of the paper plate. Next, thread some yarn onto your needle and tie a large knot on one end. Pull the thread all the way through the hole until you reach the knot.
4. Wrap the yarn through each slit around the flower, going up to one slit, then back down through the center, repeating until you have gone all the way around. Tie a knot at the end and cut off the extra yarn.
5. Thread colored yarn onto your plastic needle. If you don’t have a needle, try wrapping a small piece of tape or dabbing some glue on the end of the yarn to stiffen it. You can choose to tie a knot or leave a “tail” of yarn hanging on the other end (tails will get woven in during the last step.)

7. You are ready to weave! Start at the center and work your way around the circle, over and under, until you run out of yarn or are ready to change colors! When changing colors, you can tie the two ends of yarn to each other, or leave tails to weave in later.


8. Keep weaving around the flower until you have created a colorful flower center. Tuck tails behind the weaving and cut off any extra long pieces. Your flower is finished!