DIY Valentine's Wooden Cube Puzzle

DIY Valentine’s Cube Puzzle!
Create your own multisided puzzle with up to 6 puzzles in one by painting, coloring, or taping the sides of wooden cubes. We themed ours to Valentines Day, so you can create your own as a fun seasonal craft, or a gift to a friend or loved one!
This project can be scaled for your little artist(s) age by changing the materials you are using. Washi tape pre-cut strips would be a great way to have toddlers involved in this craft.
Follow along to try it out at home.
Materials:
9 wood cubes (about 1”), like these
Masking tape
Pencils
Your choice of the following materials
Paint, paint brush, water to clean your brush
Washi tape in multiple patterns or colors (we like MT brand, because it is very strong and comes in beautiful colors and patterns), X-Acto knife
Sharpies or acrylic paint markers
Let’s get started!
Steps
1. Start by arranging 9 wood cubes in a 3 x 3 square on scrap paper or a tray.

2. Use masking tape to tape them firmly together, so they hold the correct shape, then decorate with one of the following methods:
Paint: use masking tape to cover the exposed sides of the blocks around the edge, so your paint doesn’t spread to other sides. Draw your design with pencil first, then carefully paint in the details, before setting aside to dry.

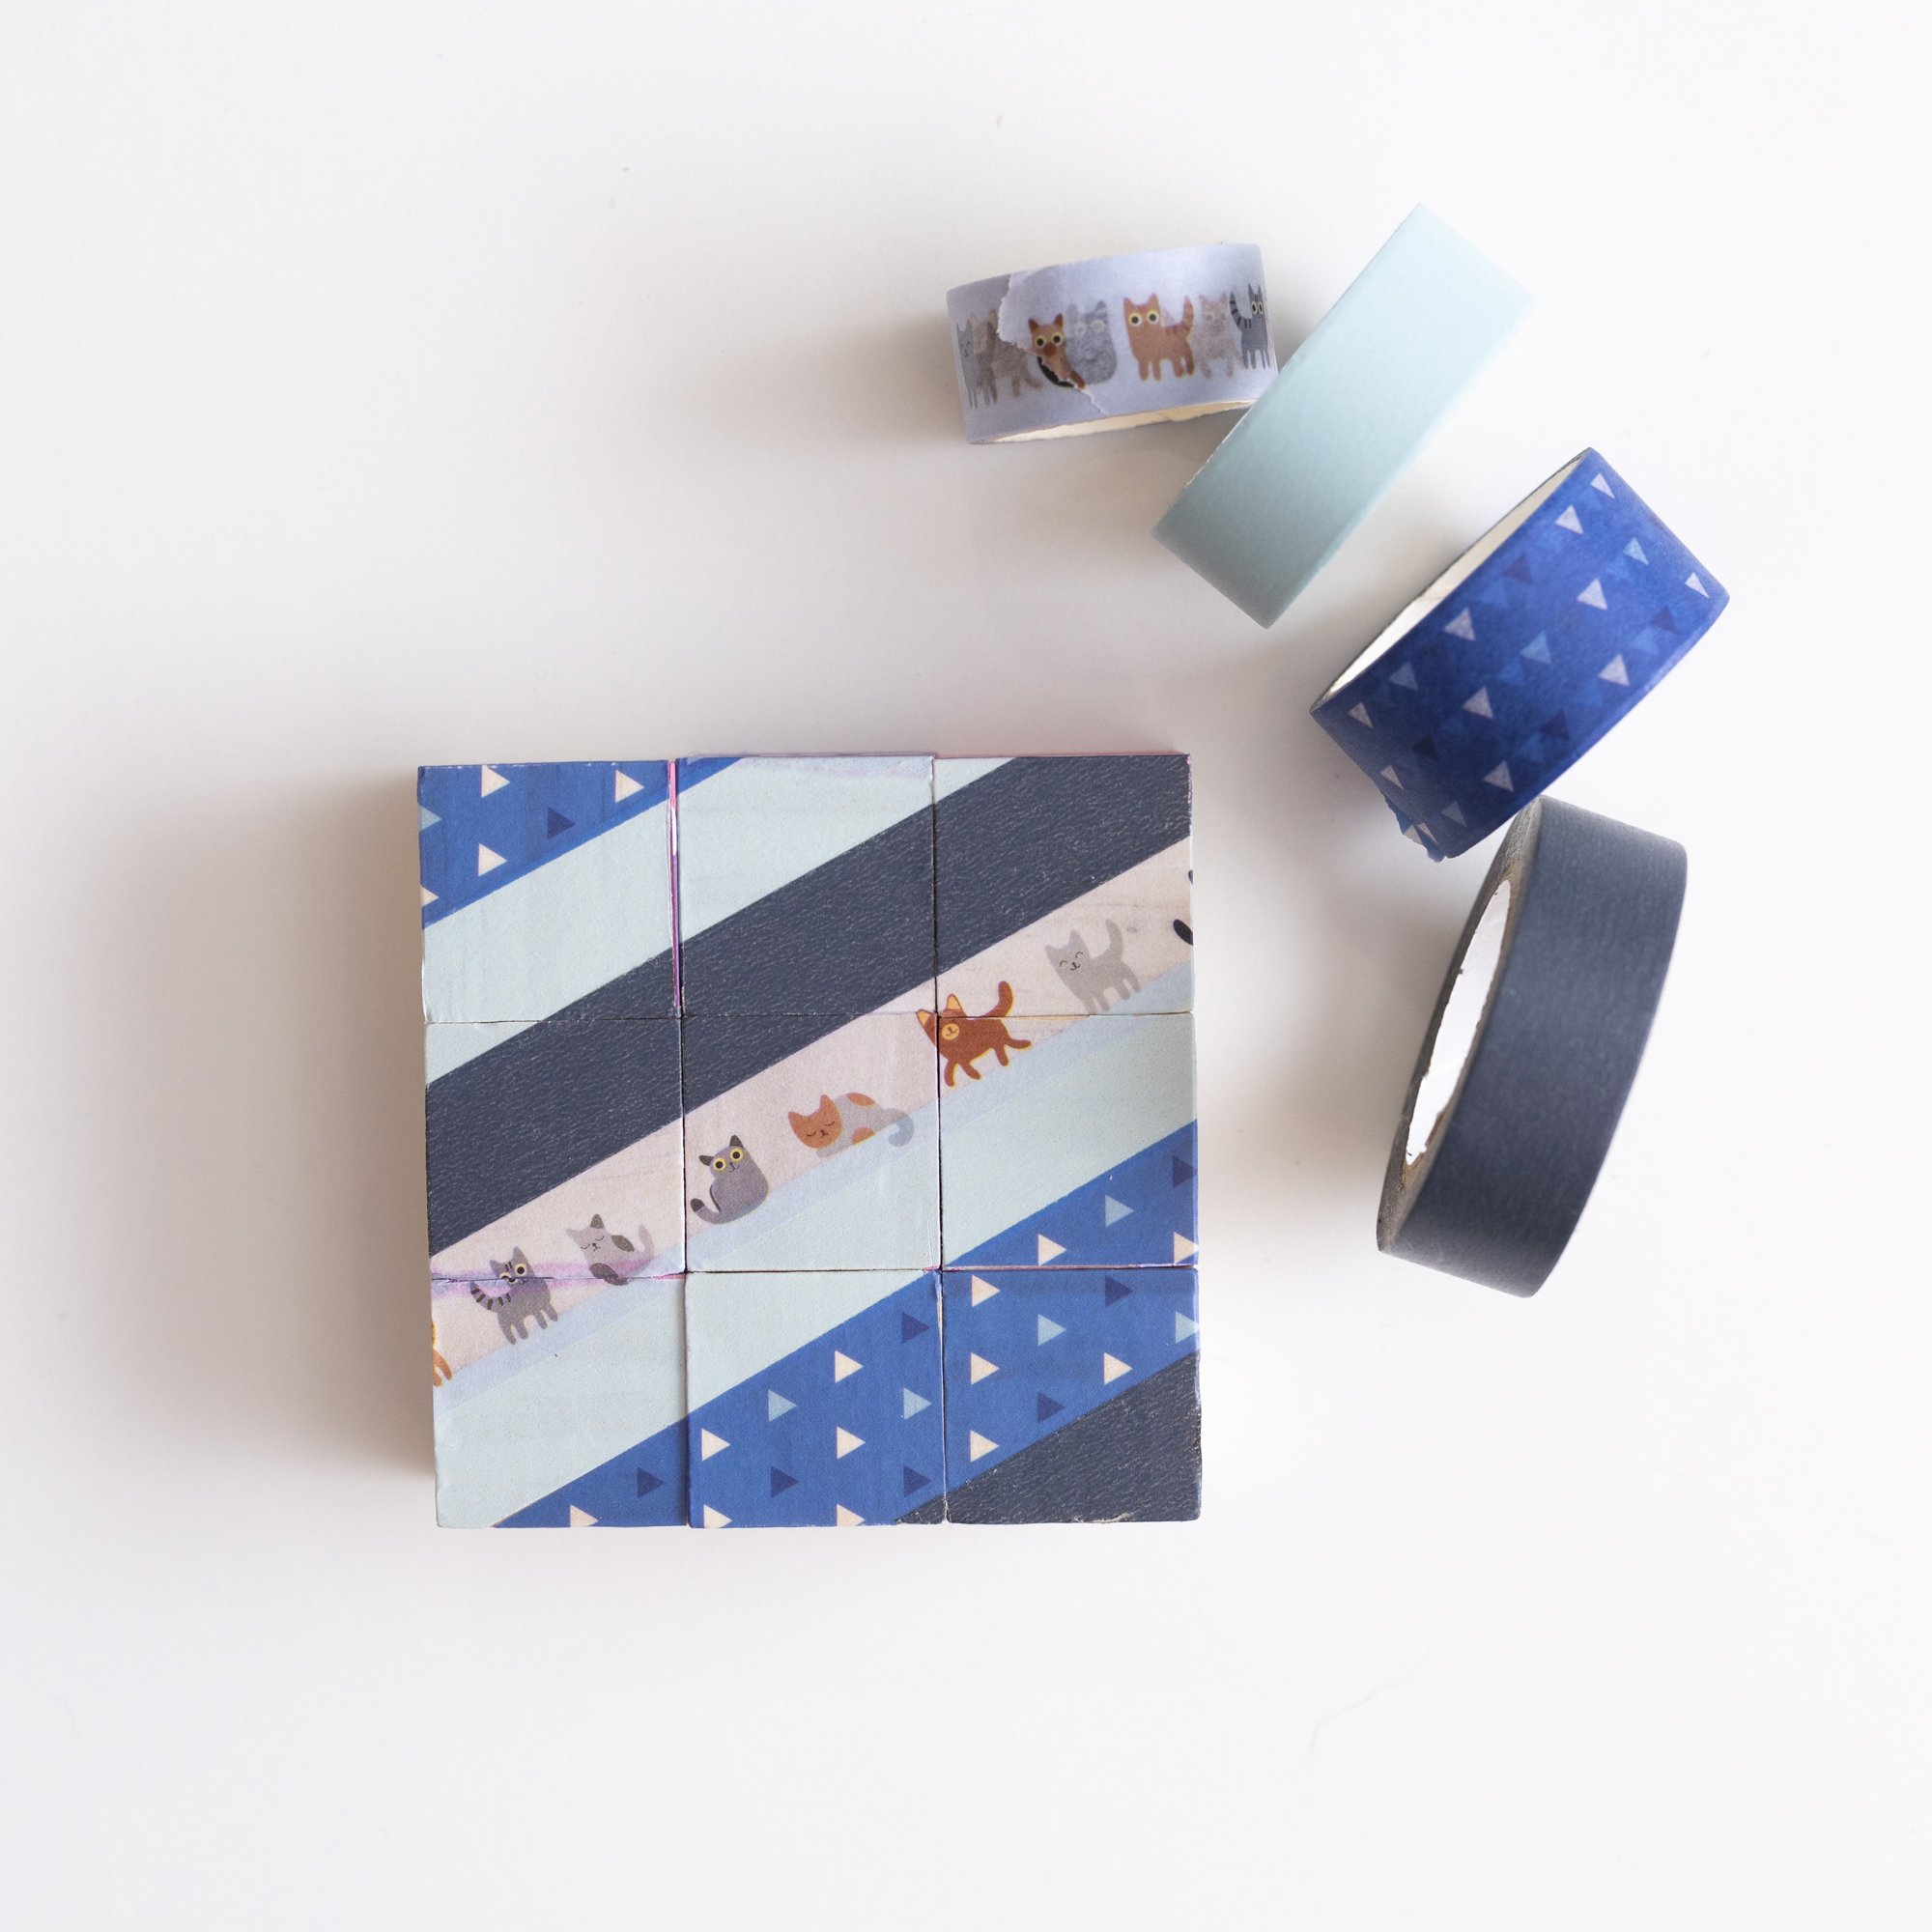
Washi tape: tape a pattern or design out on top of the blocks. The more varied you make the pattern, the easier it will be to solve the puzzle. When you have covered the top of all the cubes, carefully press the tape onto the blocks, so it is fully adhered. It can be helpful to flip the blocks upside down as well to make sure it is really stuck. Ask a grown-up for help to carefully cut the blocks apart using an X-Acto knife. When the blocks are separated, press the tape on extra firmly.
Sharpies or Acrylic markers: Plan out your design with pencil, then begin coloring your own pattern on the blocks. You could draw a picture, pattern, or choose to write a kind message, such as 9 reasons you love someone (for a Valentine’s gift!). Set aside to dry.
Note: we recommend sharpie or acrylic markers here because they do not bleed as much, but if you have a very little artist or would prefer a washable material, you can use regular washable markers.

3. When the first side of your puzzle is fully decorated and dry, remove the tape holding the puzzle together, and mix up the cubes, then flip them until only un-decorated sides are facing up, and tape them together again. You can now repeat a decorating process mentioned above, using a new method, or repeating the method you used before. Just keep in mind, that each new puzzle design will need to use different materials, different colors, or different patterns, so that you will be able distinguish between sides to solve it later.


